Two ways to upload a file in React
— React, react-dropzone, Web Development — 9 min read
In this tutorial, we're going to look at two different methods for uploading files in React. In the first method, we'll use the default file upload input and vanilla JavaScript. In the second method, we'll make use of a third-party NPM package called react-dropzone.
Tutorial Project Setup
You can clone or download the complete codebase for this tutorial from this github repo.
Once you have the codebase, you'll notice we have two folders in the root: /client and /server. In your terminal, go within each of these folders and run npm i.
Once all dependencies have been installed, in your terminal with the /client folder selected, run npm run dev. This should by default start a server at http://localhost:5173/. In another terminal with the /server folder selected, run npm run start which will initialize the API server at http://localhost:3000/.
Visit http://localhost:5173/ in your browser and you should see the tutorial project running with two options in the navigation bar. The "Native Upload" page will render the UI to demonstrate the first upload method and the "React Dropzone" page will render the UI to demonstrate the second method.
The API server runs on NodeJS and ExpressJS and exposes a single API service which accepts multipart/form-data requests and uploads files in the /server/uploads folder. We also use an NPM library called multer to enable file uploads on the server-side.
This tutorial will deal with the front-end, React-specific aspect of uploading files and will use the API server for demonstration purposes only. The API server implementation in this tutorial is actually an extract from another in-depth tutorial: 3 ways to upload files using NodeJS and Axios, which you can refer to if you wish to understand the server-side aspect of file uploads.
File Upload using Native File Input and Vanilla JavaScript
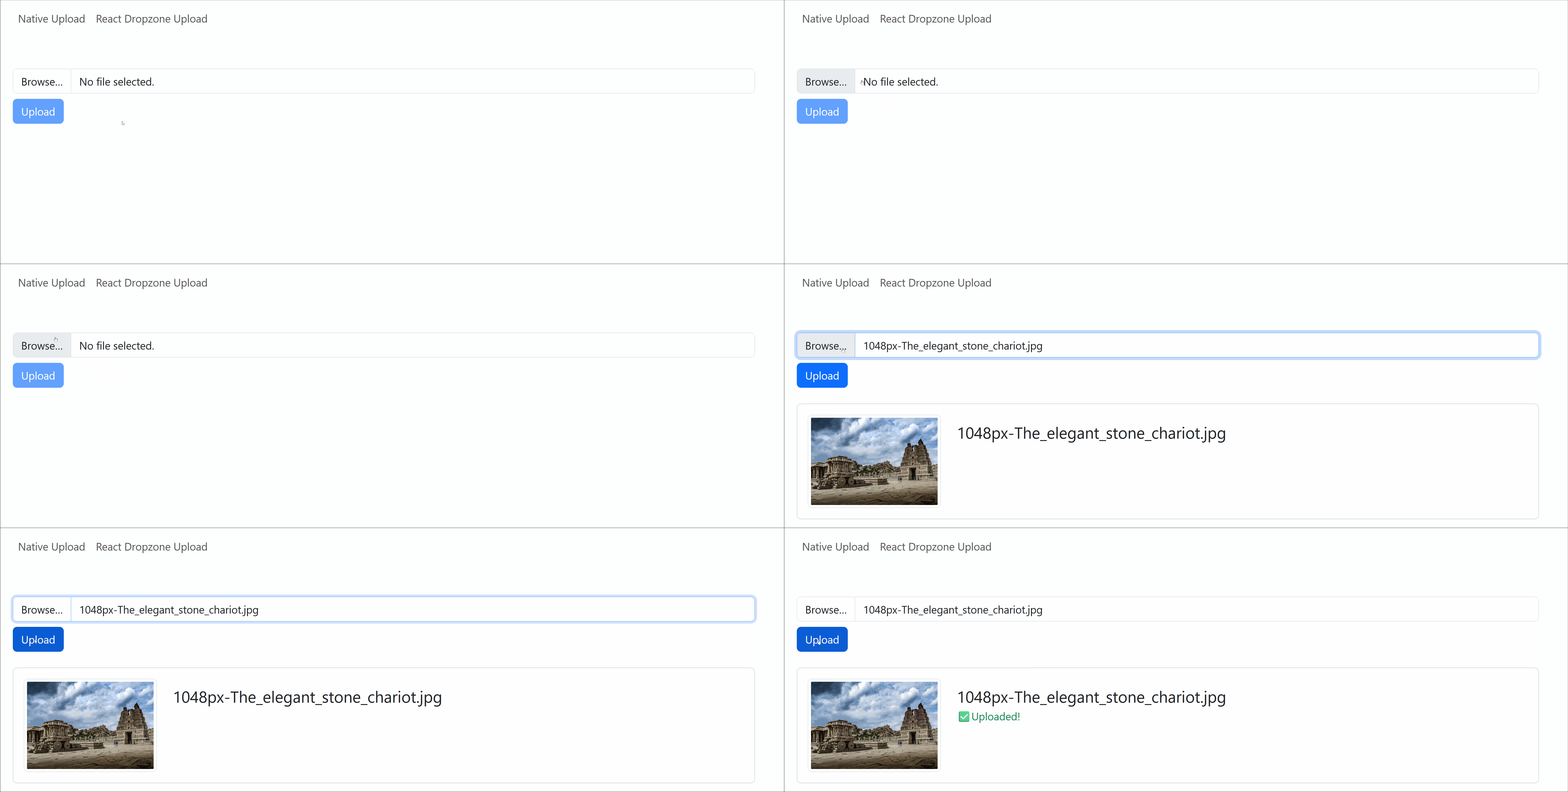
Here is how this approach works and looks like in this tutorial.

Lets go over the code for /client/src/NativeUpload.jsx.
import { useState, useRef, useEffect } from 'react'
export default function NativeUpload() { const [ selectedPhoto, setSelectedPhoto ] = useState( null ); const [ photoUploadStatus, setPhotoUploadStatus ] = useState( "idle" ); const previewRef = useRef( null );
function handlePhotoSelect( event ) { // reset photo upload status setPhotoUploadStatus( "idle" );
// reset image preview if( previewRef.current ) { URL.revokeObjectURL( previewRef.current ); previewRef.current = null; }
// set the selected photo in state setSelectedPhoto( event.target.files[0] );
// store the preview previewRef.current = URL.createObjectURL(event.target.files[0]); }
// upload photo to the server async function handlePhotoUpload(){ var formData = new FormData(); formData.append( "file", selectedPhoto );
try { setPhotoUploadStatus( "loading" );
await fetch("http://localhost:3000/upload", { method: "POST", body: formData, }); // dummy timeout to extend the duration of this operation // and properly show the loading indicator. setTimeout( () => setPhotoUploadStatus( "success" ), 1000); } catch (error) { console.error("Error:", error); } } // revoke object URLs on unmount to avoid memory leaks useEffect(() => { return () => { URL.revokeObjectURL( previewRef.current ); previewRef.current = null; } }, []);
const isUploading = photoUploadStatus == "loading"; const isUploaded = photoUploadStatus == "success"; const isUploadButtonDisabled = photoUploadStatus == "loading" || !selectedPhoto;
return ( <div className="container mt-5">
{/* FILE INPUT */} <input type="file" name="photo" onChange={handlePhotoSelect} className='form-control' /> <button type="button" onClick={handlePhotoUpload} disabled={isUploadButtonDisabled} className="btn btn-primary mt-2"> { photoUploadStatus == "loading" ? "Uploading..." : "Upload"} </button>
{/* FILE PREVIEW & UPLOAD STATUS */} { selectedPhoto && ( <div className="card d-flex mt-4"> <div className="card-body"> <div className="d-flex justify-content-start"> <img src={previewRef.current} width="200px" className="img-thumbnail" /> <div className="p-2 ps-4 d-flex flex-column justify-content-start"> <span className="fs-4">{selectedPhoto.name}</span> { isUploading && <span className="text-body-tertiary">⌛Uploading...</span> } { isUploaded && <span className="text-success">✅Uploaded!</span> } </div> </div> </div> </div> ) } </div> )}When we select a photo in the file input, it triggers the file input's onChange event and invokes the handlePhotoSelect() event handler. Within this method, we save the selected photo in the component's state selectedPhoto. We also save the photo's preview within a ref named previewRef. We make use of URL.createObjectURL() to generate a URL for this selected image on the client-side before uploading to the server. We also perform clean-up to release memory taken by these object URLs on the client-side by calling URL.revokeObjectURL().
The reason we save the preview separately in a
refand not state is because we want to be able to revoke Object URLs when the component unmounts usinguseEffect().
Finally, the "Upload" button's onClick() event invokes the handlePhotoUpload() event handler which will make an AJAX request to the API and send the file as multipart/form-data.
File Upload using react-dropzone
For our second approach, we'll use a third-party NPM library called react-dropzone. The biggest advantage of using such a library is for quickly implementing a dropzone for dragging and droppping files. It also provides other useful features like MIME-type file filtering, custom validations, etc.
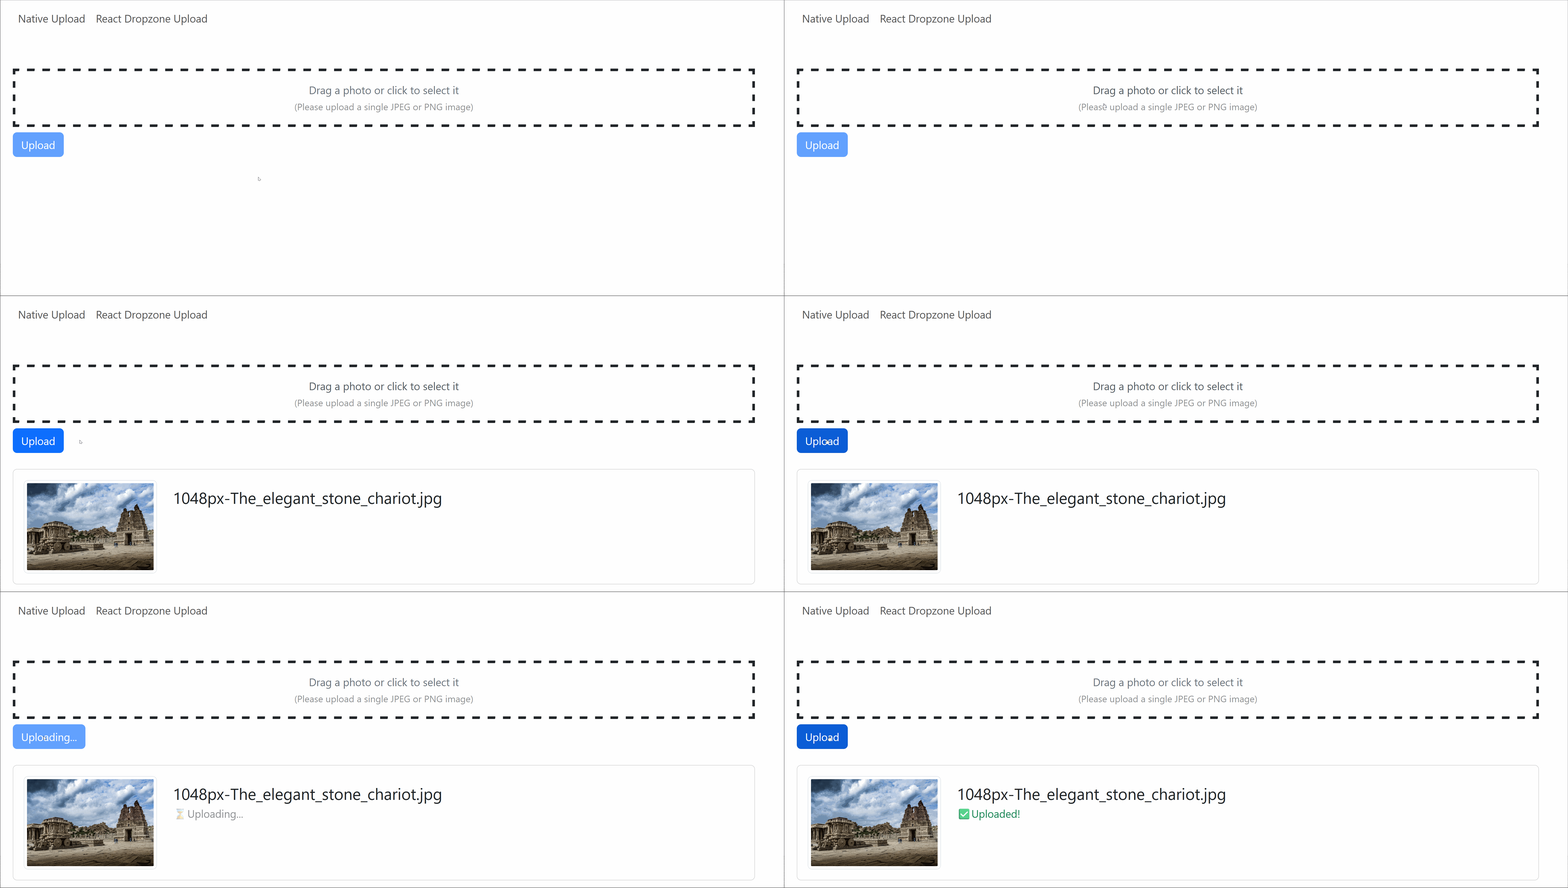
Here is how this approach works and looks like for this tutorial.

Lets look at the code for this approach. Unlike the previous approach where all the code was in one component, here we have separated the code into two components. <ReactDropzoneUpload /> acts as a container and deals with making an AJAX request to upload files to the API server. It renders the <MyDropzone /> component as a child component.
import { useState } from "react";import MyDropzone from "./MyDropzone";
export default function ReactDropzoneUpload() { const [ photoUploadStatus, setPhotoUploadStatus ] = useState( "idle" );
async function handleUploadPhoto( selectedPhoto ){ var formData = new FormData(); formData.append( "file", selectedPhoto );
try { setPhotoUploadStatus( "loading" ); await fetch("http://localhost:3000/upload", { method: "POST", body: formData, }); setTimeout( () => setPhotoUploadStatus( "success" ), 3000); } catch (error) { console.error("Error:", error); } }
function resetPhotoUploadStatus(){ setPhotoUploadStatus( "idle" ); }
return ( <div className="container mt-5"> <MyDropzone onUploadPhoto={handleUploadPhoto} uploadStatus={photoUploadStatus} resetPhotoUploadStatus={resetPhotoUploadStatus} /> </div> );}Now lets look at the code for <MyDropzone />. This component is the one that will implement the <Dropzone /> component from the react-dropzone library.
import { useEffect, useRef, useState } from 'react';import Dropzone from 'react-dropzone'
export default function MyDropzone({ onUploadPhoto, uploadStatus, resetPhotoUploadStatus }) { const [ selectedPhoto, setSelectedPhoto ] = useState( null ); const [ uploadInvalid, setUploadInvalid ] = useState( false ); const previewRef = useRef( null );
// Accept only JPEG and PNG images const accept = { "image/jpeg": [ ".jpg", ".jpeg" ], "image/png": [ ".png" ] }
/* `react-dropzone` will inject values for the two input params into this handler function. If the file is valid, it will be added to the `acceptedFiles` array. If the file is invalid, it will be added to the `fileRejections` array. */ function handleDrop( acceptedFiles, fileRejections ) { resetPhotoUploadStatus();
// reset file preview if( previewRef.current ) { URL.revokeObjectURL( previewRef.current ); previewRef.current = null; } if ( acceptedFiles.length ) { // If photo is valid, save it in state and also save a preview in `previewRef`. setSelectedPhoto(acceptedFiles[0]); setUploadInvalid( false ); previewRef.current = URL.createObjectURL(acceptedFiles[0]); } else if( fileRejections.length ) { setSelectedPhoto( null ); setUploadInvalid( true ); } }
// revoke object URLs on unmount to avoid memory leaks useEffect(() => { return () => { URL.revokeObjectURL( previewRef.current ); previewRef.current = null; } }, []);
// upload photo to the server async function handleUploadClick(){ onUploadPhoto( selectedPhoto ); }
const isUploading = uploadStatus == "loading"; const isUploaded = uploadStatus == "success"; const isUploadButtonDisabled = uploadStatus == "loading" || !selectedPhoto;
return ( <Dropzone onDrop={handleDrop} accept={accept} maxFiles="1"> {({ getRootProps, getInputProps }) => ( <div className="mt-4"> {/* FILE INPUT */} <div className="border-4" style={{cursor: "pointer", borderStyle: "dashed"}}> <div {...getRootProps({ className: "p-3 link-secondary text-center"})}> <input {...getInputProps()} /> <p className="m-0"> Drag a photo or click to select it </p> <small className={`${ uploadInvalid ? "text-danger fw-bold" : "text-body-tertiary" }`}> (Please upload a single JPEG or PNG image) </small> </div> </div>
<button type="button" onClick={handleUploadClick} className="btn btn-primary mt-2" disabled={isUploadButtonDisabled}>{ uploadStatus == "loading" ? "Uploading..." : "Upload" }</button>
{/* FILE PREVIEW & UPLOAD STATUS */} { selectedPhoto && ( <div className="card d-flex mt-4"> <div className="card-body"> <div className="d-flex justify-content-start"> <img src={previewRef.current} width="200px" className="img-thumbnail" /> <div className="p-2 ps-4 d-flex flex-column justify-content-start"> <span className="fs-4">{selectedPhoto.name}</span> { isUploading && <span className="text-body-tertiary">⌛Uploading...</span> } { isUploaded && <span className="text-success">✅Uploaded!</span> } </div> </div> </div> </div> ) } </div> )} </Dropzone> );}Lets first analyze the <Dropzone /> component which is the main export from the react-dropzone library. It receives an accepts attribute which specifies the MIME-types of the files the dropzone is expecting the user to select. For this tutorial, we're restricting files selections to only include JPEG and PNG images.
We have also specified a maxFiles attribute which takes as value the number of files that can be dropped/selected in one go. For this tutorial, we're restricting the number of simultaneous file selections to 1.
react-dropzone also provides two methods called getRootProps() and getInputProps() that initialize the dropzone container and input.
As soon as the user drops/selects an image into the dropzone, the onDrop event will be triggered and will invoke the handleDrop() event handler. react-dropzone will automatically inject two input arguments into this method. The first one acceptedFiles will be an array that will hold all dropped files that were valid and accepted while the other fileRejections will be an array that will hold all dropped files that were not valid and rejected. As specified in the maxFiles attribute on the <Dropzone /> component, we're only accepting a single photo upload. So if our dropped photo is valid, we'll save that in a state variable called selectedPhoto.
After selecting the photo, if the user clicks on the "Upload" button, then the onClick event is triggered which invokes the handleUploadClick() event handler which in turn invokes the onUploadPhoto() method received in props. This method will upload the file to the API server.
Just like in the previous strategy, we are generating file previews using URL.createObjectURL() and saving them in a ref called previewRef. We are also performing clean-up by revoking these object URLs using URL.revokeObjectURL() on component reset and unmount.
Summary
In this tutorial, we discussed two approaches for uploading images in React.
- File Upload using Native File Input and Vanilla JavaScript
- File Upload using
react-dropzone
If you don't need drag-n-drop functionality then the first option will be the way to go. The second approach will be especially beneficial if you want to implement drag-n-drop file upload functionality.
Hope this helps!🙏
Attributions
Image used for the upload was sourced from Wikipedia.